So where to start? Experience tells me that the initial entry threshold is rather high, although the current and former docker, are quite different animals.
I was inspired to write this article by a conversation overheard in a company. It concerned the creation of docker images, and it was commented with the statement that "It is incredibly difficult!". I don't quite agree with this conclusion. In my opinion, it is enough to know the absolute basics of the technology being used and working with a given operating system, and there will be no insurmountable obstacles in our way. But of course, this is my opinion, and you, after all, have no reason to believe me, right? At the beginning of my docker adventure I, too, read tutorials on the Internet, while making big eyes and wondering "What have I gotten myself into?!"
So let's play - you'll see that a tame docker doesn't bite (too often).
What is the plan? We'll briefly discuss the basics of working with the docker, so that we have a consistent view of the terms that come up. Then we'll put our own application in the container, provide it with everything it needs, and finally we'll go completely crazy, first absurdly complicating and then containerizing our entire test system.
Note: our image will include an application developed with .Net Core technology, but if you're not on your way with your Redmond uncle - don't run away just yet! The following instructions can be easily adapted to a whole range of other technologies, as long as you know how to compile your application using a terminal.
A brief digression before we get to the substance. Let's answer one question - why? It's my application, I have a great IDE for it that even brews coffee, why should I bother with dockerization? Setting aside the idea of implementing a docker in production (I won't suggest anything here, you'll have to decide for yourself whether it's a good idea in your project), applications are rarely lonely islands. Information systems are often made up of dozens or even hundreds of smaller cubes, co-creating a (wobbly) whole. Some of them will be written in a language we don't know, and sometimes haven't even heard of. What do I need to install and what commands to use to run them? And if - horror of horrors - something doesn't work, where to look for help? A thread on Stack Overflow? A ritual sacrifice of a chestnut goat? Anyone who has seen it, anyone who knows ...
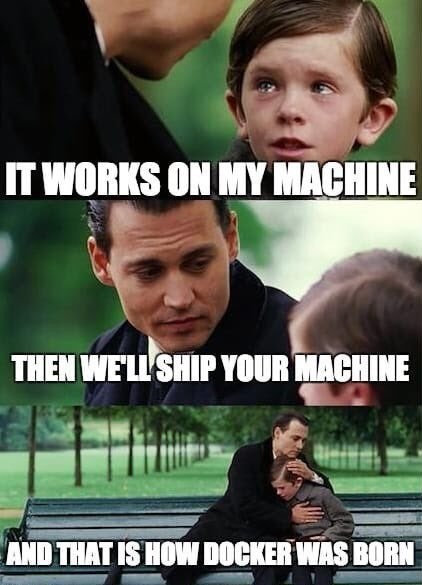
However, these programs were created by some programmers, maybe still working with us or maybe living only in memories and legends. One might even conjecture that these programmers were able to run the application in question and convince them to do their job. If only they had left behind unambiguous instructions for operation.... Or, if there had been a way to locally run the application in a way that was completely consistent with its operation in production.... And no, wait a minute, that's what docker is good for!
Repeatability, standardization, simplicity. And, of course, some additional problems, just for balance ;-)
Docker talk
In the title falls the word "dockerization" - a derivative of the name docker. The broader equivalent of the term is containerization, but the words have actually become synonymous. Docker is simply the most popular way of containerization, although, of course, there are other providers of this type of service(such as this one).
Docker helps you put your application inside a container. But what exactly is all this container stuff? Docker itself defines a container as:
A container is a standard unit of software that packages up code and all its dependencies so the application runs quickly and reliably from one computing environment to another.
Good, that is, we gain speed and reliability when running applications on different environments. Have you ever floated someone with the words "It works for me"? Well, unfortunately, you won't be able to wriggle out that way anymore.
We read on:
A Docker container image is a lightweight, standalone, executable package of software that includes everything needed to run an application: code, runtime, system tools, system libraries and settings.
I brought all the toys with me, not only the application, but also the whole runtime environment, so I am completely independent! Wait, that's not the same as a virtual machine? Not really - a virtual machine includes the operating system that will run on it. Containers don't have a system - instead, they use the host system kernel. This is what makes them lightweight and fast - they contain only what an application needs.
In passing, two terms have been smuggled in here - container and image - so it would probably be good to establish what they mean:
- A container is a living organism that we can run and that performs some tasks. Ultimately, the application will just run in the container.
- An image is a collection of data that makes the container possible. The image itself cannot be run.
The best analogy that can be used here (borrowed, I am not the author and unfortunately I don't remember the source) is class and object. An image is like a class - it describes what the container will do, itself not being runnable in any way. A container is like an instance of a class, running and ready to go.
That's almost the end of the dry theory, but let's still mention the container's relationship with the operating system. In addition to what we brought with us in the image, an application needs three more things to be happy: a file system (because it has to live somewhere), a process tree (because it has to run somewhere) and a network configuration (because it has to be in contact with the world). All three are provided via a docker engine straight from the host operating system. Each container has its own file system, process tree and addressing, completely isolated from both the host and the containers running in parallel.
Okay, now that we know all this, let's get to work.
But how? Let's containerize!
First of all, we need an application. Since this is an absolutely secondary issue, we will simply do so
λ > dotnet new webapp -o aspnetcoreapp
We will get a simple application called aspnetcoreapp. We'll come back to it later, but right now it's completely enough for us.
To create docker images, we need a docker (duh!) and a special file called Dockerfile(documentation). It describes how to build the image, what operating system to use, where to get our application, etc. It is simply a script that packs everything into one box, called an image. The first thing we need is a source image - yes, just as classes inherit from each other, images are also built on top of other images. We do this with the FROM command
1 | FROM mcr.microsoft.com/dotnet/core/sdk:3.1 AS build
Since we're running in a dotnet environment, we'll use images containing the .Net Core 3.1 SDK. We'll find all the libraries and dependencies used by .Net Core, so we won't have to add them ourselves. These images are maintained by Microsoft, so they are generally up-to-date. A word of warning - Microsoft sometimes likes to mess with the naming of images for no apparent reason, so by the time you read this, the naming of images may already be out of date. You can always find the latest images on DockerHub.
Note: if you are not a dotnet user at all, but just got tangled up here from the Internet - have no fear! DockerHub contains images for probably every possible technology, just take a moment to look for it
2 | WORKDIR /app
3 |
4 | COPY aspnetcoreapp/aspnetcoreapp.csproj ./
5 | RUN dotnet restore
Let's keep working! Using the WORKDIR command, we set the current working directory(WORKDIR will create a directory if it doesn't find one) inside the build image. Using the COPY command, we copy our project file to the inside of the image, after which we download all the required dependencies.
Another word about copying - we copy the file from the build context (more on that later) to the inside of the image. So all paths are relative paths, having their beginning either in the build context or in WORKDIR.
Since we have the dependencies taken care of, all that remains is to download all the remaining files
7 | COPY . ./
and build an application
8 | RUN dotnet publish -c Release -p:PublishDir=./output
aspnetcoreapp/aspnetcoreapp.csproj
This is actually where the building process could end. A cliché, right? But we won't do that, because it would contradict one of the assumptions of containerization - a minimal package to run the application. Our image build is based on dotnet/core/sdk and it has to stay that way - the sdk contains all the tools needed to build and debug (yes, you can debug inside the container!) the application. Ultimately, however, we won't need it for anything, after all, we just want to run our program, not compile some code. So let's use a more minimalist image, dotnet/core/aspnet, and a process called multi-stage build.
10| FROM mcr.microsoft.com/dotnet/core/aspnet:3.1 AS runtime
11| WORKDIR /app
12|
13| COPY --from=build /app/output .
We move to another base image with the FROM command and create a new WORKDIR - this time in a dotnet/core/aspnet based image. Then we copy the result of the dotnet publish command, but not from the build context, but from the previous build stage! The more observant probably noticed that in the first line we marked our image as build - we did it just for this purpose. Subsequent stages have access to the data contained in previous stages.
The only thing left to do is to point the finger at what the created container (PID 1) should actually do. The ENTRYPOINT command is used for this.
17| ENTRYPOINT ["dotnet", "aspnetcoreapp.dll"]
In addition, we can still add the EXPOSE command, informing users of our image that they can expect something on a given port. This is in no way required for it to work, just such a pseudo-documentation.
15| EXPOSE 80
And there you have it, the pain is over! In all its glory, our Dockerfile looks as follows:
1 | FROM mcr.microsoft.com/dotnet/core/sdk:3.1 AS build
2 | WORKDIR /app
3 |
4 | COPY aspnetcoreapp/aspnetcoreapp.csproj ./
5 | RUN dotnet restore
6 |
7 | COPY . ./
8 | RUN dotnet publish -c Release -p:PublishDir=./output aspnetcoreapp/aspnetcoreapp.csproj
9 |
10| FROM mcr.microsoft.com/dotnet/core/aspnet:3.1 AS runtime
11| WORKDIR /app
12|
13| COPY --from=build /app/output .
14|
15| EXPOSE 80
16|
17| ENTRYPOINT ["dotnet", "aspnetcoreapp.dll"]
My first painting
We already have a Dockerfile containing the definition of our image, nice, but.... now what? Dockerfile is not yet an image, to get something from it we still need to build it. This is done with the command
λ > docker build -f Dockerfile -t aspnetcoreimage .
The -f parameter indicates the location of the Dockerfile, and in this case we could omit it completely, as that is its default value. The -t parameter specifies the name of our image like mcr.microsoft.com/dotnet/core/aspnet in the case of our base image. The dot at the end is not a typo at all, ha, not this time! That dot is actually our mysterious build context, which I have scared you with before.
Build context is the data passed to the image (actually to the docker daemon) at the build stage. So we can only access them from within the Dockerfile and they will not be part of the output image - unless we decide otherwise(vide the COPY command). Since our build process assumes the pre-existence of the application's sources (we could instead, for example, download it from git), we have to pass them through the build context. The dot here denotes the directory from which we executed the docker build command - all files and directories contained therein will be usable for building our image.
Well, that's right, all of them, without exception. Regardless of whether we will need them or not. Again, this is at odds with the minimalist approach, after all, every unnecessary megabyte will slow down and complicate the build process. Fortunately, something can be done about that, too! What a happy coincidence, right?
At this point, another file - .dockerignore - enters the scene (all in white...). It is to Dockerfile what .gitignore is to git - it shows what not to pay attention to. Just as it doesn't make sense to keep everything in the repository, we won't need every file to create an image. It sounds trivial - how much space can be saved by getting rid of bin, out and .git? In small projects, indeed, the differences will be small, but over time the context will start to swell and swell, until eventually we find that we are already sending hundreds of MB of junk, significantly slowing everything down. Take my word for it. Been there, seen that. Sometimes I still have nightmares.
A moment's pause, writing to you I from the future. Literally a few days after writing these words, I was talking to a colleague working on some serious IT project. He complained that building images of his application had become incredibly slow. It was the build context that turned out to be the culprit. Buckle up, in a moment authentic logs before and after adding a simple .dockerignore file:
Sending build context to Docker daemon 825MB
Sending build context to Docker daemon 2.676MB
We deviated a bit from the topic - we were building our image. Let's see what also happened after executing the docker build command:
λ > docker build -f Dockerfile -t aspnetcoreimage .
Sending build context to Docker daemon 4.393MB
Step 1/11 : FROM mcr.microsoft.com/dotnet/core/sdk:3.1 AS build
---> cf60f383a8d1
Step 2/11 : WORKDIR /app
---> Running in a0141eff2546
Removing intermediate container a0141eff2546
---> ad1a813fab27
Step 3/11 : COPY aspnetcoreapp/aspnetcoreapp.csproj ./
---> e7b454992e8a
Step 4/11 : RUN dotnet restore
---> Running in f27c6ff45ec6
Determining projects to restore...
Restored /app/aspnetcoreapp.csproj (in 157 ms).
Removing intermediate container f27c6ff45ec6
---> 805893f96f5c
Step 5/11 : COPY . ./
---> b70ad4b4d3cb
Step 6/11 : RUN dotnet publish -c Release -p:PublishDir=./output aspnetcoreapp/aspnetcoreapp.csproj
---> Running in 4a8a17424f5f
Microsoft (R) Build Engine version 16.6.0+5ff7b0c9e for .NET Core
Copyright (C) Microsoft Corporation. All rights reserved.Determining projects to restore...
Restored /app/aspnetcoreapp/aspnetcoreapp.csproj (in 150 ms).
aspnetcoreapp -> /app/aspnetcoreapp/bin/Release/netcoreapp3.1/aspnetcoreapp.dll
aspnetcoreapp -> /app/aspnetcoreapp/bin/Release/netcoreapp3.1/aspnetcoreapp.Views.dll
aspnetcoreapp -> /app/aspnetcoreapp/output/
Removing intermediate container 4a8a17424f5f
---> ad742806d55f
Step 7/11 : FROM mcr.microsoft.com/dotnet/core/aspnet:3.1 AS runtime
---> 8aa5a7e8b51a
Step 8/11 : WORKDIR /app
---> Running in e8f6b81bd2b1
Removing intermediate container e8f6b81bd2b1
---> fc4cefd5b42a
Step 9/11 : COPY --from=build /app/aspnetcoreapp/output .
---> 0f8072747c1d
Step 10/11 : EXPOSE 80
---> Running in a72be83c219f
Removing intermediate container a72be83c219f
---> b06cb3bc5f75
Step 11/11 : ENTRYPOINT ["dotnet", "aspnetcoreapp.dll"]
---> Running in dd0286e426d0
Removing intermediate container dd0286e426d0
---> a5b89154c9a1
Successfully built a5b89154c9a1
Successfully tagged aspnetcoreimage:latest
Docker deamon obediently followed all the instructions in the Dockerfile, created an image named aspnetcoreimage and gave it the latest tag (about tags another time, working tag == version).
Super! Nothing but to start the container and you can already open the champagne!
λ > docker run --name awesomeaspnetcontainer aspnetcoreimage:latest
info: Microsoft.Hosting.Lifetime[0]
Now listening on: http://[::::]:80
info: Microsoft.Hosting.Lifetime[0]
Application started. Press Ctrl+C to shut down.
info: Microsoft.Hosting.Lifetime[0]
Hosting environment: Production
info: Microsoft.Hosting.Lifetime[0]
Content root path: /app
A little more detail
Our application works (even if we haven't installed dotnet sdk on the host!), but there is no contact with the outside world. So it's time to put our imagination to work and complicate things a bit.

We won't implement anything, because that's not the purpose of this exercise. Instead, we will pretend that our little app communicates with other services inside the system - what the heck! For the sake of the experiment, let's assume that:
- We are using some other API to process queries, let's make it ProductAPI
- The application uses a database, let's make it MySQL
- The application uses a cache in the form of redis, because who can forbid a rich person to use it
Patching their addresses into the code will not work, so let's slightly modify the appsettings.json file and add some more details there.
{
"ProductApiAddress": null,
"MySql": {
"ConnectionString": null
},
"Redis": {
"ConnectionString": null
}
}
We could create a dozen versions of this file (localhost, dev, qa, uat, prod, ...) and use the appropriate one, but that sounds uninviting - not only will we have to maintain them, but the images will contain sensitive data. Instead, let's use environment variables for this purpose.
The IConfiguration interface, which is responsible for handling configuration files, among other things, has several internal sources of truth. One of them is (by default) EnvironmentVariablesConfigurationProvider, capable of translating environment variables found on the system (or, as in this case, inside the container) into fields visible in the appsettings file. This involves some magic syntax that is worth knowing about. Wanting to access the configuration key, for example
Redis:ConnectionString
use an environment variable named
Redis__ConnectionString
Trivial, right? I don't know why Microsoft doesn't brag about it more, at one time it took me a while to discover this dependency...
The configuration provided in this way is not included in the image itself, so the risk of losing it is lower. All that remains is to pass the appropriate values to the inside of the container. We will do this during its startup:
λ > docker run --name awesomeaspnetcontainer -e "ProductApiAddress=acme.com/api" -e "MySql__ConnectionString=server=acme.com;database=ToyStoryCharacters;user=andy;password=WoodyPride" -e "Redis__ConnectionString=acme.com:1337" aspnetcoreimage:latest
Psst, instead of adding everything to a single command you can use the configuration file
We have taken care of communication with other services, but if we try to get some information from our application running in the container we find that queries are flying into the void. What's going on? Although the application started inside on port 80, docker runtime by default does not share any ports from inside the container with the outside world. We have to do it ourselves. Port 80 is sometimes quite heavily occupied, but we are still inside the container, so it doesn't matter in the least. Since the network addressing of individual containers and the host are completely disconnected things, you can have dozens of containers running internally on the same port and they won't interfere with each other. However, to somehow get to our application, we need to map the aforementioned port 80 to any (free) port of the physical machine - say port 5000. This also needs to be done when starting the container
λ > docker run --name awesomeaspnetcontainer -e "ProductApiAddress=acme.com/api" -e "MySql__ConnectionString=server=acme.com;database=ToyStoryCharacters;user=andy;password=WoodyPride" -e "Redis__ConnectionString=acme.com:1337" -p 5000:80 aspnetcoreimage:latest
Our program already knows where to find everything it will need for its work, and has learned how to respond to the requests you send it. Great. We can finally leave it alone and let it quietly perform its tasks. We, on the other hand, move on to another issue.
Orchestration
No, it's not about orchestration management at all, I just haven't found a good term for it in Polish yet. This is about container management. All of the previous steps were designed to make your job easier by automating the process of running applications, so who in their right mind would want to manually write shuffles in the console while doing this, right? After all, the command you see above is some kind of drama! No, no, no, that's not for us. Of course, there is a simpler way to do it, in fact, dozens of them. One of them is docker-compose(documentation) - a tool that will again simplify our work. We'll write once, and then take care of everything with a simple command. Seriously, I promise it will be that simple this time!
The basis of docker compose is the docker-compose.yml file. Yes, you read that right, this file will just be in YAML format. Yes, YAML is still alive and there are still people who use it. And yes, it is quite cumbersome, but you can get used to it. I will console the staunch opponents of YAML that you can use JSON format instead.
Without further ado - docker-compose.yml is (among other things) another way of saving what we have been doing so far with the docker run command. In our case, this entire file will look as follows
1 | version: '2'
2 |
3 | services:
4 | awesomeaspnetcontainer:
5 | container_name: awesomeaspnetcontainer
6 | image: aspnetcoreimage:latest
7 | ports:
8 | - "5000:80"
9 | environment:
10| - ProductApiAddress=acme.com/api
11| - MySql__ConnectionString=server=acme.com;database=ToyStoryCharacters;user=andy;password=WoodyPride
12| - Redis__ConnectionString=acme.com:1337
This is basically the same information we used before, presented in a different form. By dumping all the details into a YAML file, we can actually forget about them. Running our application will now come down to one simple command
λ > docker-compose up
Creating network "example_default" with the default driver
Creating awesomeaspnetcontainer ... done
No extra magic, no complications, the application works. In fact, we don't even need to know exactly what we are running, because the computer remembers it for us.
An additional plus is that compose itself cleans up its containers after its dog. When running them manually, we have to take care ourselves that they have a meaningful and unique name, and that we don't leave behind orphaned containers that running and dogging will cause your premature graying.... Docker compose is another level of automation that will take care of all this for us.
Let's get crazy - orchestrating a bigger system
Someone might now accuse me that using docker compose when you have a single container is overkill. There is a bit of a point in that, although I personally appreciate the convenience of keeping everything in a .yml file. Compose shows its true capabilities when we have more containers. Much more. At one time, putting up locally the system I was working with at the time, I needed more than forty of them. Many of the applications running there I knew only by name, without even knowing what technology they were created in. Horse and pony who would run such a monstrosity without containerization!
A little earlier we convinced ourselves that our application required MySQL, redis and the mysterious ProductAPI to run. Let's let our imagination run a bit wild and add a handful more technologies in there. Maybe some application in Node.js? Maybe some NGINX? Consul? RabbitMQ? Elasticsearch?
Although we're taking technologies from the ceiling, it's not hard to imagine that a larger IT system could use them all. We could easily encapsulate it all in a single docker-compose file and run it automagically, with a single click.
Our bloated and exaggerated docker-compose.yml could look like this:
version: '2'
services:
awesomeaspnetcontainer:
container_name: awesomeaspnetcontainer
image: aspnetcoreimage:latest
# configuration
redis_asp:
container_name: redisasp
image: redis
# configuration
mysql_asp:
container_name: mysqlasp
image: mysql
# configuration
volumes:
- mysql-data-volume:/var/lib/mysql
product_api:
container_name: productapi
image: secretregistry.com/productapi:latest
# configuration
nginx:
container_name: nginx
image: nginx
# configuration
rabbitmq:
container_name: rabbitmq
image: rabbitmq
# configuration
consul:
container_name: consul
image: consul
# configuration
elastic:
container_name: elastic
image: elasticsearch
# configuration
volumes:
- elastic-data-volume:/usr/share/elasticsearch/data
nodeapp:
container_name: nodeapp
image: secretregistry.com/nodeapp:latest
# configuration
dotnetcoreapp:
container_name: dotnetcoreapp
image: secretregistry.com/dotnetcoreapp
# configuration
javaapp:
container_name: javaapp
image: secretregistry.com/javaapp
# configuration
mongo:
container_name: mongo
image: mongo
# configuration
volumes:
- mongo-data-volume:/data/db
volumes:
mysql-data-volume:
elastic-data-volume:
mongo-data-volume:
And God knows what else. Starting a whole system like this is one command, which, by the way, I have thrown at you before
λ > docker-compose up
As a user (programmer/tester) of such a system, you don't even need to know what's going on inside - at least, as long as everything works as it should. Sky is the limit!
Summary
I hope the above article has piqued your curiosity and, above all, left you unsatisfied. We learned what containerization is, we learned how to pack an application into an image and what to do with it later to make it useful. If you made it to this point without skipping paragraphs - congratulations on your perseverance! You are well on your way to becoming more familiar with the docker. And this is just the beginning - despite the extensive description you've already managed to get acquainted with, these are just the basics. However, this is an important first step, and after all, you have to start with one. All indications are that docker will stay with us for a long time, so it's in the interest of all of us - gray cogs in IT projects - to make friends with it.
Before you start, however, I must warn you! Docker is addictive.
Docker is like the free first hit of coke. Next thing you know you are using k8s
behind a dumpster in an alley, wondering where your life went. - Anonymous reddit user